
InBox DynamicFieldTimeAccounted
Version 7.0.1
Creation date 01/02/2018
Resources
This module creates a new type of dynamic field that can be used to track hours worked. It is also used as a parameter for more accurate reports.
Prerequisites
Framework
The following versions of the Znuny framework are supported:
- [7.0.x]
Modules
The following modules are required:
- InBox Core 7.0.1 or superior
Operational system
The following operating systems are required:
- [None]
Third Party Software
The following third party software is required:
- [None]
Installation
bin/otrs.Console.pl Admin::Package::Install /path/to/InBox\ DynamicFieldTimeAccounted 7.0.1.opm
Configuration
This module can be configured via the 'System Configuration' in the administrative interface. The following configuration options are available:
DynamicFieldTimeAccounted::DefaultRange
Default value between start and end dates (in minutes). NOTE: Accepts only integer values. Default Value = 60.
DynamicFieldTimeAccounted::CreateArticleEndDate
Create the article at the moment the end time is pointed out. Default Value = Enabled.
DynamicFieldTimeAccounted::CreateTicketRetroactive
Create the ticket when the end time is specified. Default Value = Disabled.
Use
Placing a dynamic field on a screen
After installing the module, a new dynamic field will be created, which can be found by going to the 'Admin -> Dynamic Fields' menu:

The following screen will be displayed:

On this screen, we can see that the field created automatically is named "TimeAccounted." With this name in hand, we can navigate to the configuration of a screen. As it's being created for the "Article" object, it will need to be created on a page related to articles. To do this, we should access "Admin -> System Configuration" in the administrative menu and search for the configuration "TicketNote###DynamicField."


On the next screen, the setting should be enabled for editing, click to add a line and place the field name "TimeAccounted" on the left side (in the key), and on the right side choose the option enabled (in the value):

After saving the configuration and implementing the changes, the field will be accessible in the agent interface. In the above case, it will be enabled on the 'AgentTicketNote' screen.
Time Tracking
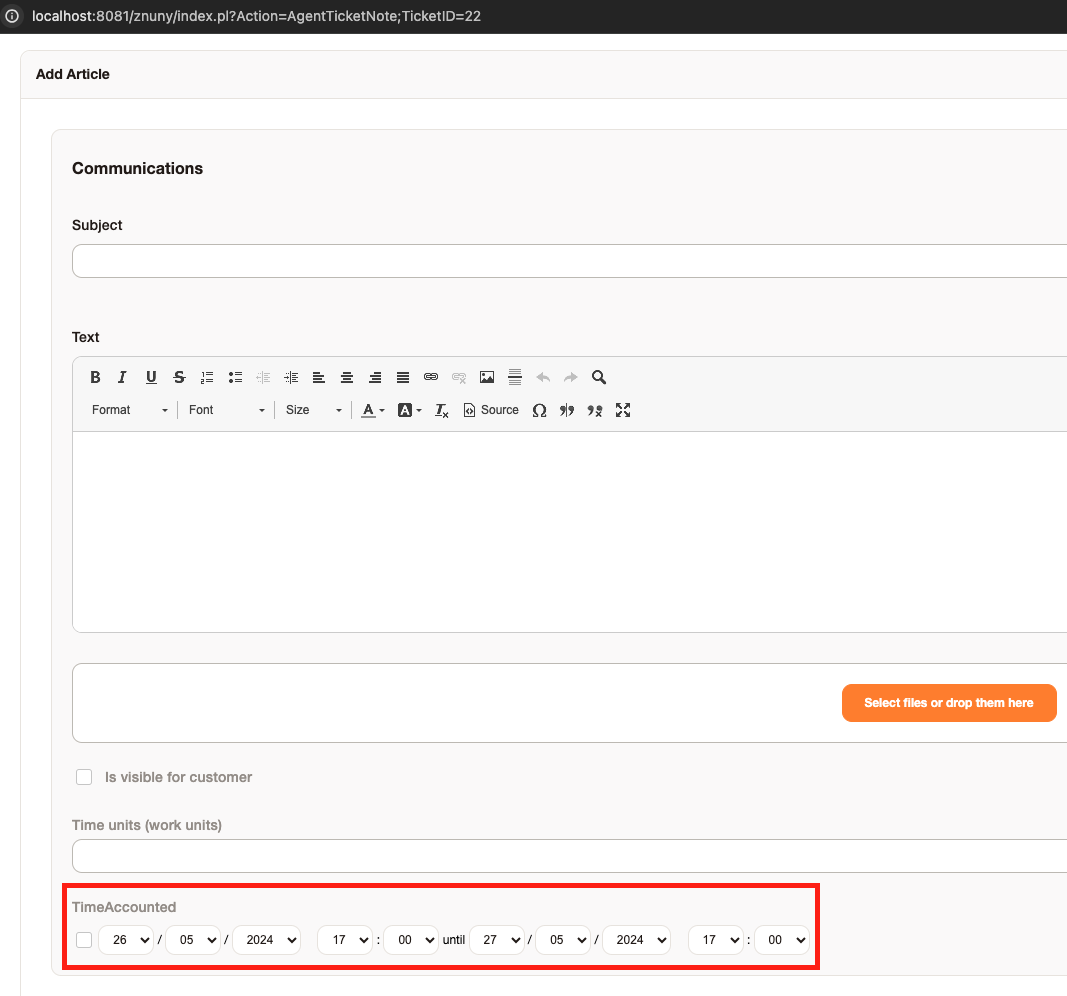
With the field already configured in "AgentTicketNote", just go to the ticket, select the "Communication" menu, and click on the "Note" submenu:

The following information will be displayed in a new window:

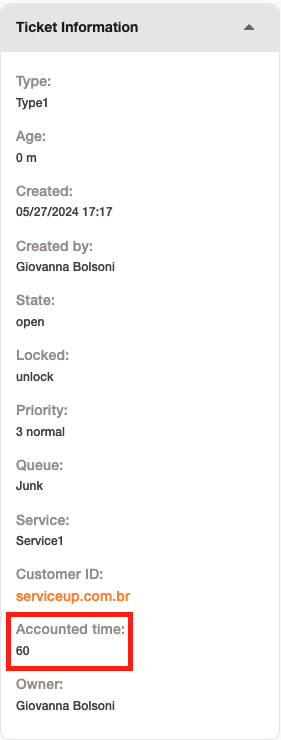
In the example above, 60 minutes worked will be accounted for between the period 27/05/2024 16:08 and 27/05/2024 17:08.
Retroactive time tracking
There's the option for the article to be created at the exact moment the end date is selected, meaning: the agent can log hours on the current day, but the article will be created on the previous day.

Editing time tracking
The option called "Time Accounted Edit" is located under "Miscellaneous" in the ticket viewing interface. With it, you can edit the recorded time of a specific desired article.


Define maximum pointing time
There is an option within the field record to include a maximum time for notes in minutes.
